
Anedot Learn session transcript ↓
Colleen:
Hey, this is Colleen with Anedot. Welcome to Anedot Learn where we help you grow your organization through giving.
Today I'm going to walk through some of the most frequently asked questions that we receive.
What is the difference between a donation page and a lead page?

First, we'll take a look at the FAQs related to our Action Pages.
One of the most commonly asked questions that we get related to our Action Pages is what is the difference between a donation page and a lead page and how do I use them?
So if we look at our Action Page index here, this is where we see the option to create either a lead page or a donation page.
A lead page is used to collect really any information outside of actually processing a donation, whereas a donation page is exactly as it sounds.
A lead page, you can collect an email address, a phone number, or birth date.
You can have someone answer a question. So really, anything outside of actually processing that donation.
Most folks will use these for email sign ups, volunteer sign ups, petition signings, things like that.
But the great thing about donation pages is you can collect all of that information and process a donation.
So really the differentiator here is a lead page does not process a donation, but it collects information.
A donation page can collect that information, but it will also process a donation.
How do I add a logo and different brand colors to my Action Page?
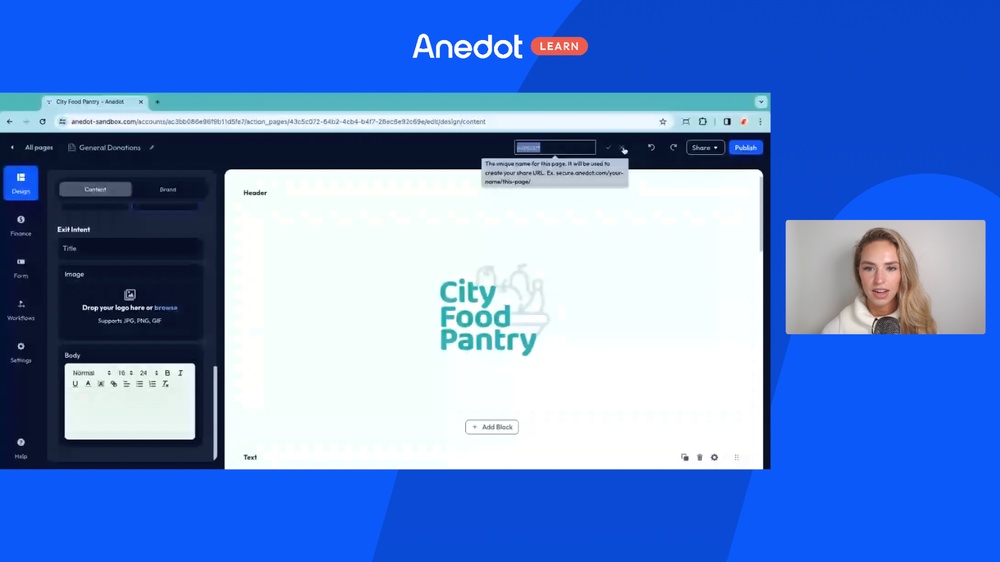
Moving into the Action Page Builder. Many people ask, how do I add a logo and different brand colors to my page?
So if we're looking at our general donation page here and we click Edit next to it, this will bring us to our Action Page Builder.
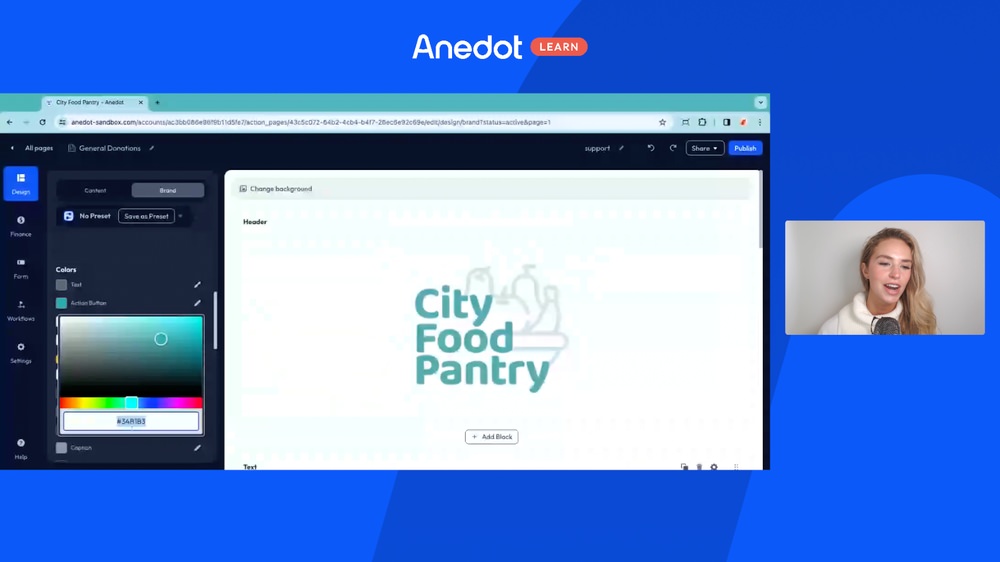
So on the left hand side, you'll see this Design tab and then you'll see this Brand option here.
So under Brand, this is where we can add and adjust all of the different elements on our page that are related to the specific brand.
So you'll see here we have our logo, we have all of our different colors, and if we scroll down, there's even more that you can edit there.
But in order to add a logo, if we hit this Browse button, this will bring all of the images that we've used on our account before.
But if you don't have your logo in your account yet, that's okay.
You can click anywhere in this box and it will allow you to upload a file from your computer. So we'll just save this logo here.
And if we scroll down this is where you can adjust all of the different elements related to your colors. So we always say it's great to customize your Action Buttons.
So that would be your preset amounts and that would also be your call to action buttons.
So that donate button. We can customize that by clicking this little edit icon and you can copy paste your hex code.
Or if you're feeling creative, you can drag and drop and choose a different color to match your logo or to compliment your logo.
And then if you scroll down here, this is where you can customize all of the different elements.
But that's just a quick way on how to add a logo and how to customize those call to action buttons.
How do I save a change to a preset versus save the change to a single page?
This is a great question and it's great that we're looking at this Brand element here because this is a great space to add a preset.
So if I select, say, this default preset here, this allows me to have my specific edits on a preset.
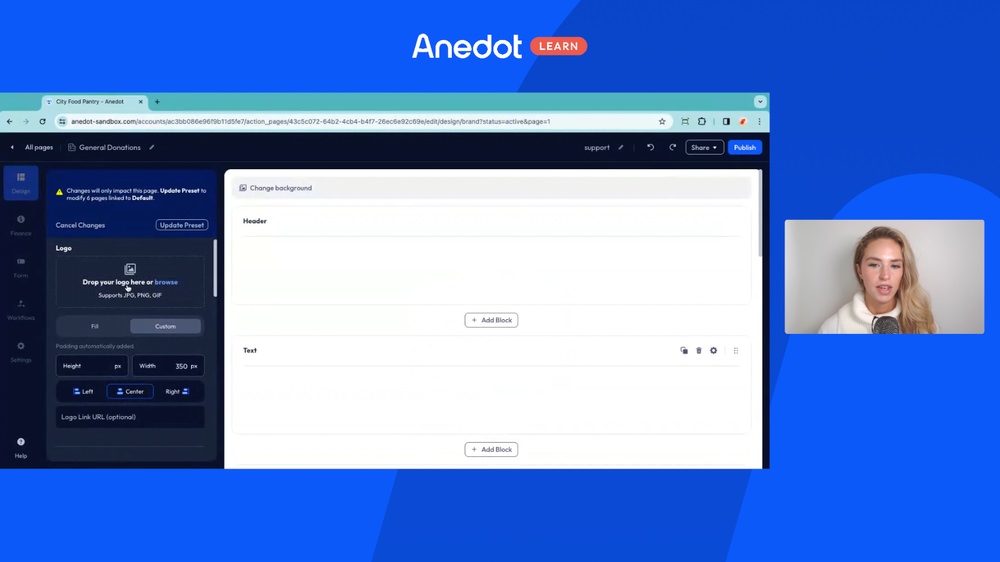
So say our logo is updated, our logo changes and we need to update a new photo.
So we can drag and drop from our computer here, have our updated logo and you'll see here it asks us, this change will impact six pages or modify six pages, do you want to update the preset?
If you don't want to, and it's just a specific page that you want to have a different logo on. You'll just hit Publish. But if you want to save it to the preset, you'll click Update Preset.
So here, if we add our image, we save it. That's already saved. So it doesn't ask me.
But if we ever want to adjust this preset to be linked to all of our pages rather than just the six that we saw just a minute ago, we can click All Pages or we can uncheck pages.
So really, presets is just a great way to be able to customize multiple pages at one time.
So if you have hundreds of pages, there's dozens of pages in your account and you just need to update your hex codes, your brand colors, you can do that quickly without having to go page by page.
But in short, if you need to save it just to a page and not to a single preset, just hit Publish.
How do I add a new fund to a page?
So many people will ask this. And the first step to add a new find to a page is to make sure that we have the fund created within your account.
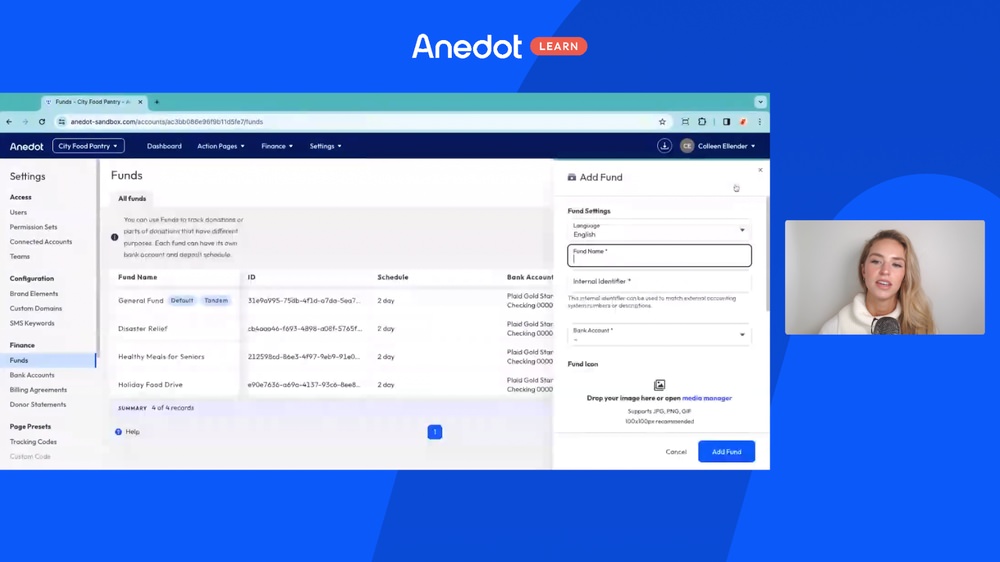
So if you go to Settings, Finance here, this is where you'll see all of the funds that we've created.
So you should see your general fund by default.
And then if you want to create an additional fund, you can click Add Fund, add the fund name, add the internal identifier, select the bank account, add the fund icon, as well as the disclaimer which we’ll come back to that and you can make it the default fund and the default for tandem/conduit as well.
But if you're trying to add it to the page, the first step is to add it to the settings area and then we'll go back to our Action Page index.
We'll edit the page that we want to add the fund to. And then under this Finance area, you'll see the option to click Funds and this is where you can add many funds as a visible fund or you can add them as a dropdown.
If you just want to have, say, one fund like this one kind of behind the scenes so it's not actually visible to the supporter, you can do that here too.
So that's great. If you have say, two bank accounts, two different funds, those funds need to be directed to two different bank accounts. You can add those there.
And then of course, there's additional details that you can customize as well.
But in short, in order to add a fund to a page first, you'll add it to the settings area and then you'll go back to your Action Page that you want to edit and go to the builder under Finance, Funds and add that fund there.
When are receipts sent, who are they sent to, and how do I customize them?
We often get asked several questions related to receipts.
We get asked when are receipts sent, who are they sent to? How do I customize them? Is there a way that I can make them feel more personal?
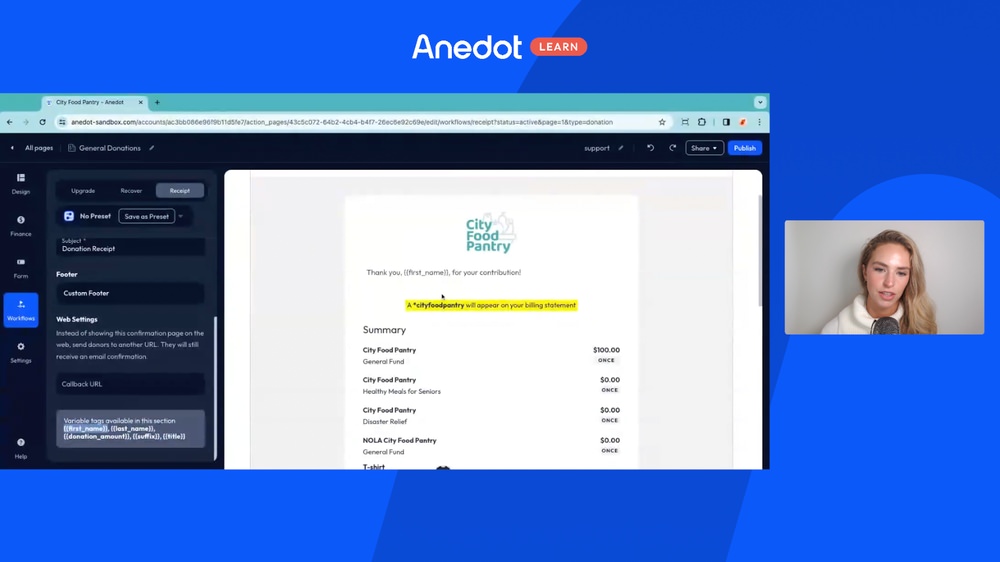
And really anything related to receipts, you'll want to go to this Workflows area and click Receipt.
So on the right hand side, you'll see kind of a draft example of what a receipt looks like.
So every time a supporter makes a donation, they will receive a receipt and it will have the details of their donation as well as the information that they input in order to make the donation.
→ Here are some best practices to create the perfect donation receipt template!
So they will receive a receipt and so will a user on the Anedot account with the appropriate permissions. If you want to turn that off, that's totally okay.
And I will go over that a little bit later. That can be adjusted in your Anedot ID notification settings.
But to answer the question on timing and who receives an email, each supporter that makes a donation does receive a receipt saying thank you and you can customize that by just clicking your logo.
If you want to address that, you can click directly on the text to edit the text.
You know, customize the sizing kind of what that actually looks like as well as adding variable tags.
So to answer that question on how to make it feel personal, it's great to say thank you and add that first name variable tag for your contribution.
And an easy way to do that is you can just copy and paste that variable tag there and it will automatically pull up the first name that they input to make the donation.
So it could say, thank you, Colleen, for your contribution, which just feels a lot more personal than a general thank you.
So that's a quick way to customize and personalize your receipt.
And like I said, we will go over a little bit later how to adjust your notification settings.
How do I edit my donation page link?
Moving along, someone asked how do I edit my donation page link?
So automatically if you click this Share and Copy Link, the slug, so the very back end of the page will be this support or donate.
Or if you haven’t customized it, it will be numbers and letters.
But if you want to make that very clean and customized, all you have to do is hit this little edit icon and it will tell you, you know, an example is secure.anedot.com/your-name, so your account name and then your slug.
So if you want to make that customized for maybe a specific event or initiative, you can do that there and then just click the checkmark to save.
And then once you're ready to share your page, you can just click Share and you can either copy the link for the hosted form, click Embed on Your Site, which will copy the embed link.
And you can also download the QR code.
Every single donation page that you create will have a customized QR code that's automatically generated so it makes it very easy to share.
How do I delete an Action Page?
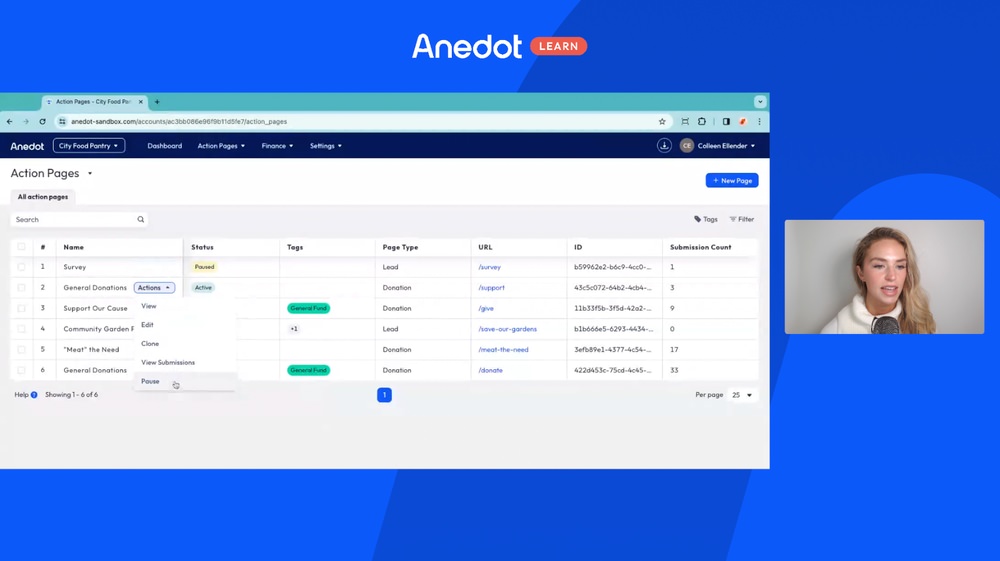
Last question related to Action Pages is how do I delete a page?
So many people ask this, you know, if they create a page in there, maybe getting used to building different pages and then they don't actually want to use it.
You can very easily delete a page or really it's archiving a page. So that way if you ever needed to see it again, you could.
And the way to do that is you'll click, Edit, Pause, and then once it's paused you'll click Actions and Archive.
So that will remove it from your view. So that way if you're done using it, you don't have to look at it anymore.
But if you ever need it back, you can click Filter and you can you can actually filter on the different statuses and you can look at those archived pages.
So that's a way to keep your pages very clean and organized. But I will note if you pause a page, it will pause recurring giving related to that page, and if you archive a page, it will cancel recurring commitments that are linked to that page.
So if you don't want to do that, I would suggest going in to the builder and just adjusting that slug that we just talked about because that will allow no new donations on the page because no one will have that link and I would just be sure to title it something like no longer needed.
Or you could just put maybe an X for the slug and then actually change the name of the page to no longer needed.
So that way people know it's active because you want to keep those recurring, active, but we don't want to receive new donations on that page.
Where can I add a disclaimer that will show on every single donation page?
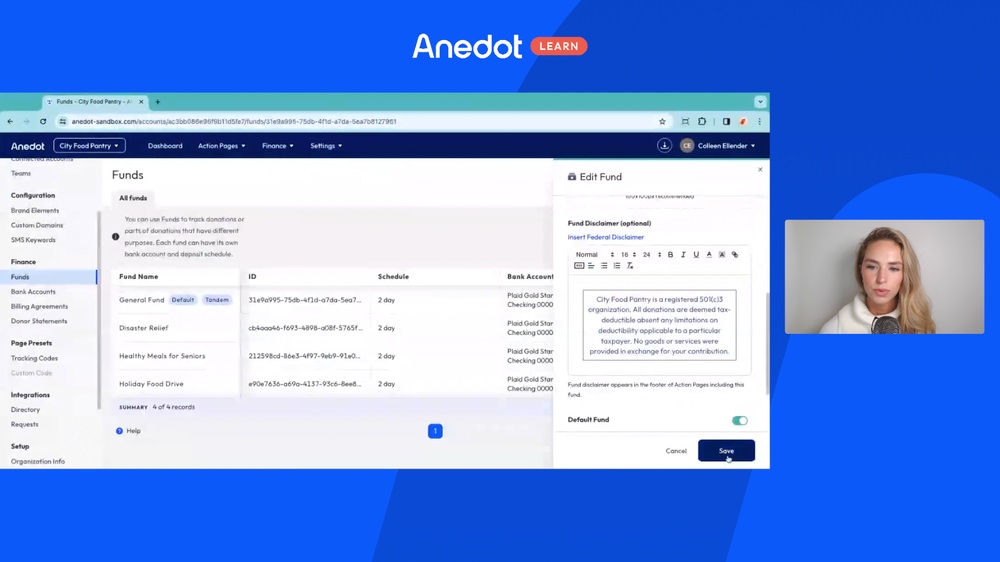
Moving on to our most commonly asked questions regarding the Settings area of the account, many people will ask us, where can I add a disclaimer that will show on every single donation page?
So if we go to the Settings area of the account again and we click Finance, we're looking back at our funds.
So if we look at our default fund, which is our general fund, and we click View, and we scroll down, this is where we suggest adding your disclaimer.
So you can type exactly what it is, add a box around it, make sure it's clean and formatted and click Save.
And any donation page that is connected to this fund will have that disclaimer at the bottom.
So that's an easy, quick way to make sure that that disclaimer is added where it needs to be.
And you can also select which fund you'd like to be your default fund here as well. And then just hit Save.
What are Teams/Custom Permission Sets?
Teams and Custom Permission Sets are used to scope someone's permissions or to organize someone's permissions.
So Teams here, as you can see, we have, as an example, a digital vendor and a memberships tag.
So say we have maybe multiple different vendors on our account and we only want them to be able to edit and access the data related to the pages that they're working on.
A very easy and quick way to do that would be to create a digital vendor team.
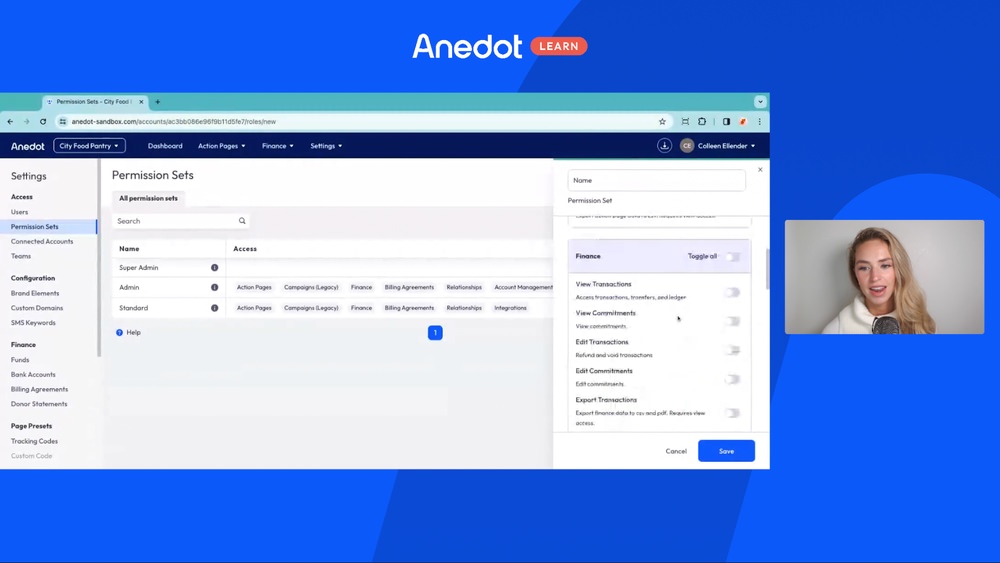
So you'll see here our digital vendor team and then you could also go to Permissions Sets here and create, say, maybe a digital vendor permission set.
So you can really edit the permissions set to a granular level if you only want someone to be able to view pages, you can do that.
If you want them to be able to have access to Finance and things like that, you can do that as well.
And then when you're ready to add your team or if you need to adjust someone's permissions, you can absolutely do that by just clicking Actions, Edit.
And then you'll see here it will ask you what permissions set.
So that's where we'd see that custom permissions set as well as that team. And once you hit Save, that will scope their permissions.
And you can always go to the Action Page index again and check those tags.
So if I run the digital vendor to you, I would only see that one Action Page with that digital vendor team tag.
So Teams and Tags are both great ways to scope permissions and keep things organized as you need to.
How do SMS Actions work?

So if we go back to the Settings area of our account and we go to Configuration and SMS Keywords, this is where, if you'd like to, you can set up SMS keywords.
So you can see here, for example, we have City Food Pantry set up.
If a supporter texts the word City Food Pantry to this number, then they'll receive the link to the donation page to make a donation.
So here you'll see under Action Page, Choose Action Page, we have our general donation page set up.
We have our keyword and we have that phone number, which all of these things can be adjusted here.
But just a very easy, quick way to do that would be add keyword, choose your donation page and add that specific keyword that you want the supporter to text, and that's where they'll receive the link to donate.
How is a billing agreement added to a page? What permission set does this require?
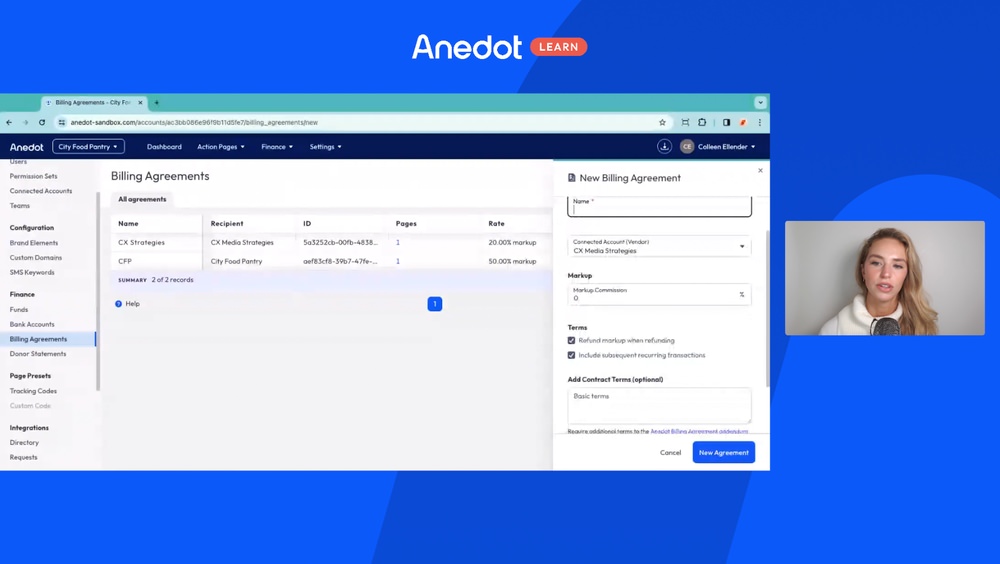
So a billing agreement again can be found under the Settings area under Finance, Billing Agreement.
The way to add a new agreement to the page is at the top right here, and we would just click New Agreement. We'd label that however we want that labeled, which is seen internally.
We’d connect the vendor account. So if we've already connected the vendor account, we'd see it here.
If not, you’d click Connect New Account and you’d add the Account UID which is this a string here of the vendor account.
So you can see that in this slug of the vendor account. Add that there, it would add them as a vendor and then you could add the commission that you'd like to see.
So if it's 10%, you could add that there, if you need to add contract terms, you can do that there and then it will ask you what Action Page you'd like that associated with.
So once you have that added to the page and added to, added to the Settings area of the account, if you go back to your Action Pages and you click Edit, you can check that and you can just make sure the billing agreement is correct.
This one does not have a billing agreement attached to it, so it's grayed out, but if it did, it would have a little, it would be highlighted in yellow and you could hover over it to make sure that the billing agreement is the correct percentage.
To answer the question related to who can create a billing agreement, who can access these.
So you can adjust that under Permission Sets if you have a custom permission set created, you can absolutely do that.
Anyone with super admin access can add a billing agreement or of course the account owner as well.
Someone with admin permissions can see them, but they can't actually create them. So you'll see here they can view billing agreements but they can't edit them.
So really, if you want to give someone permission on your account to create a billing agreement, you would want to add them as a super admin or create a custom permission set that enables them to do so.
What is Virtual Terminal used for?
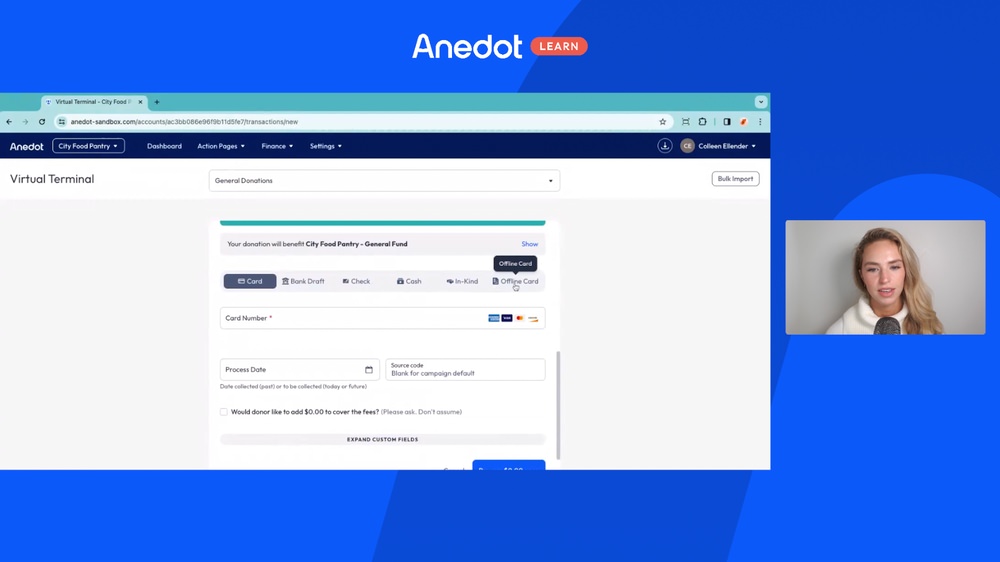
So under Finance here you'll see that there is the option to click Virtual Terminal.
So Virtual Terminal is great because if someone calls and makes a donation and maybe they don't have a computer in front of them and maybe they don't have a smartphone or they're not comfortable making a donation themselves, you can go in and process a donation on their behalf.
So you can type in their information, select the amount, and you can choose card or bank draft to actually process a donation.
Or if you want to only log a donation, so say someone had given in the past via cash or check and you just want to log that in Anedot so that all of your donations are in one place, you can do that as well.
So that would be check, cash, in-kind, and offline card.
This is great so that at the end of the year when you're ready to send out your donor statements, all of those donations are included in the donor statement.
So if they gave you a cash or check, that would be included on their donor statement, it wouldn't only go to the folks that made donations via card and bank draft.
All of these can be bulk imported as well if needed. You could just click Bulk Import.
How do I send a donor statement?
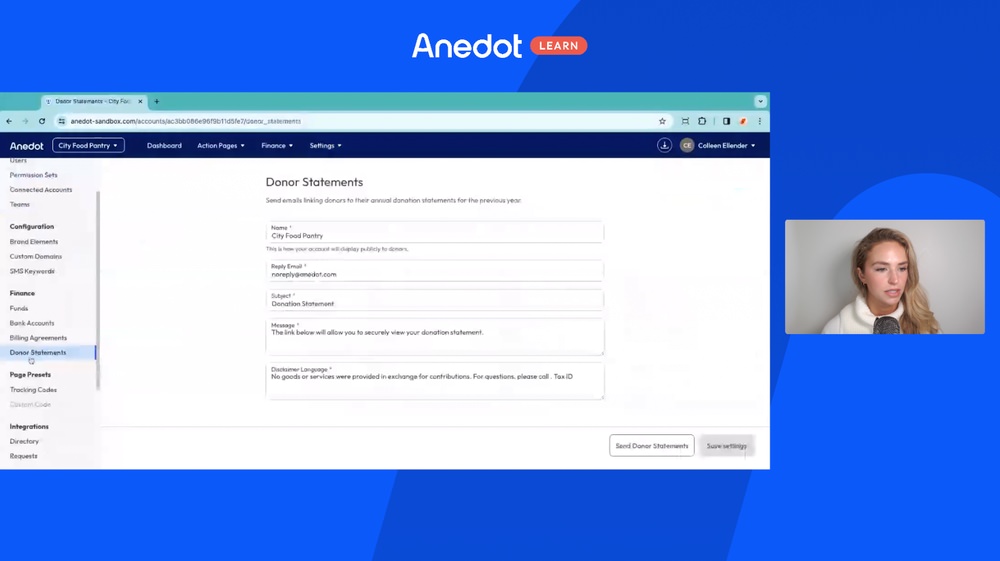
So under the Settings area of our account, we can view our donor statements.
So we'll click Donor Statements here and you'll see you can adjust the name, the reply email, the subject, the message, the disclaimer language.
You can really customize all of that information.
And once you're ready to send, you’ll click Send Donor Statements and you can confirm, yes, I'd like to send my donor statement and this will cover the prior year.
So say it's January of 2024. This will include all of the donations that were made in 2023.
Last are the FAQs related to Finance.
Is there a way to filter on one Action Page or a certain time frame or a certain supporter's information?

And yes, there is.
So if we go to this Finance area here and we click Entries, this will show us essentially a ledger of the account.
All of the donations received, all of the transfers to our bank account.
And if we want to filter on certain criteria, we could say include selected here, select the Action Pages that we want to view.
If we want to view all of them, we can click All, and we can filter by date.
Say we have a monthly reconciliation, we could filter on the month here.
If we want to filter on a specific supporter's information, say their email address, we could see their history by doing that there.
So really any credentials that you want to filter on and and kind of look at independently, you can do that there and you would just hit Apply Filter.
And once you do that you can choose to export the information if you'd like, to CSV, PDF Detail, or PDF Summary.
But that's a quick way to kind of filter the information that you're looking at and that's always found under Finance, Entries.
Is there a quick way to see which donations are included within the deposit made to my bank account?
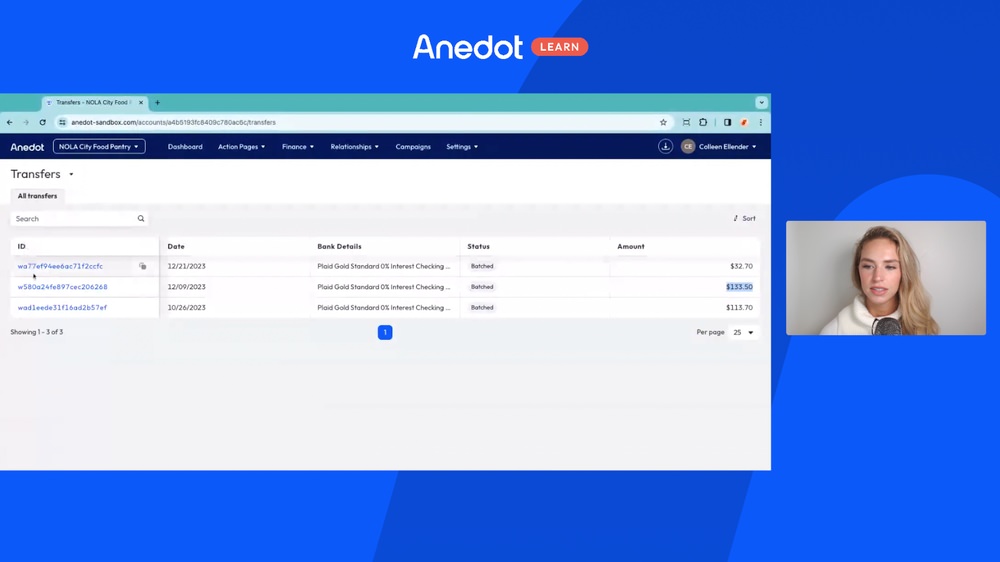
Yes. So the easiest way to do that is go to Finance, Transfers here and this will show me all of the transfers that were made to my bank account.
So I'll see here, for example, this transfer of $133.50.
If I click this ID, this withdrawal ID, starting with the w, it will show me all of the donations that made up that deposit.
So this is a very easy way to reconcile what was actually deposited to your bank account and the donations that were made.
How can I adjust my notification settings?

The last question that we'll go over is how to adjust your notification settings within Anedot.
So I briefly mentioned this before when we were talking about how to edit receipts and if you look at the right top side of your screen and you click on your name, you'll see there's the option to click Notification Settings.
And if I click that, it will ask me what account I'm looking at. So if I just, for example, click one here.
If I don't want to receive a email each time a donation is made or received, you can uncheck that.
If I don't want to be cc’ed on the donation receipt copy, I can uncheck that.
So really, whatever you want to customize, you can customize there and click Save. So that's just a very easy, quick way on how to adjust that information.
But if you have any questions or need anything, you can always email us at help@anedot.com.
Thank you!
80 Community Service Ideas for Nonprofits