Every nonprofit organization needs a way to receive donations online!
Online fundraising has grown in popularity exponentially over the past few years. So if you haven’t already, your first step is to get your organization signed up with a donation platform.
Choose the donation platform

Choosing a donation platform can seem like a daunting task, but it doesn’t have to be.
Just be sure to do your research and pick a provider that will meet all of your fundraising needs.
Choose a platform that provides fully customizable landing pages, fundraising tools, and great customer support.
Anedot provides powerful giving tools that are made easy for everyone to use. We proudly do not charge monthly fees and we have the best service team in the business!
Make it easy for people to donate on your website

Once you get started with your donation platform, you can then work to add a donation page to your website.
After the donation page is up on your website, it's time to add the donation button!
By adding a donation button to your organization’s website, it creates a permanent call-to-action and gives your supporters a way to contribute to your organization at any time.
Making the process of donating from your website easier will truly help people give like never before.
So, whether you’re an experienced web developer or completely clueless when it comes to web design, creating donation buttons that capture donors’ attention and encourage giving are a proven tool you can incorporate on your WordPress site.
Now, let’s break down how to add the donation button to a WordPress page. Here’s a step by step guide:
Install the button on the site

1. Create your donation page
First, you’ll need to create and customize your donation page.
Pro-tip: Create a designated page that you will link to your website so you can track what donations you receive from there.
2. Copy the URL to your donation page
The next step is to copy your donation page's link.
All you have to do is:
- Navigate to your donation page
- Head over to the URL in your browser's address bar
- Highlight the entire URL
- Copy the link, right click, then click "Copy"
Once you have copied your donation page link, choose the WordPress page that you want to add the button on and go to the editor.
3. Add a button block to your WordPress page
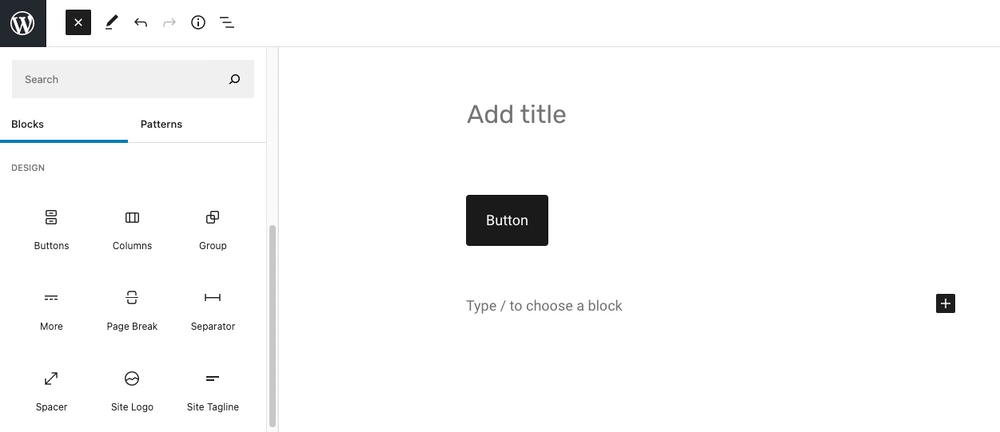
To add a Buttons block, click on the Block Inserter + icon.
Once you add your first button, you can type what you’d like the button to say.
For more information on how to add and customize the page, check out the WordPress support article on the Buttons Block.
4. Publish your WordPress site
After you save the button block, it’s time to publish.
Before you publish the changes to the live site, make sure the new link works and that everything looks correct.
That’s all there is to it!
80 Community Service Ideas for Nonprofits


