Anedot Learn session transcript ↓
Hey, this is Colleen with Anedot.
Welcome to Anedot Learn where we help you grow your organization through giving.
Today I'll be walking through how to build a standard donation page using Action Pages.
I'll be touching on a few FAQs, such as how to edit your automated email receipts, how to share your donation page via a QR code or URL, how to clone a donation page and edit that page that you've cloned, as well as touch on a few basic tips on how to organize your donation pages and just keep everything clean and easy when you log into your account.
These features will help you raise more money online and save yourself a lot of time in the process.
Action Pages Gallery
Before I show you guys how to actually build a donation page, I wanted to show a really helpful resource.
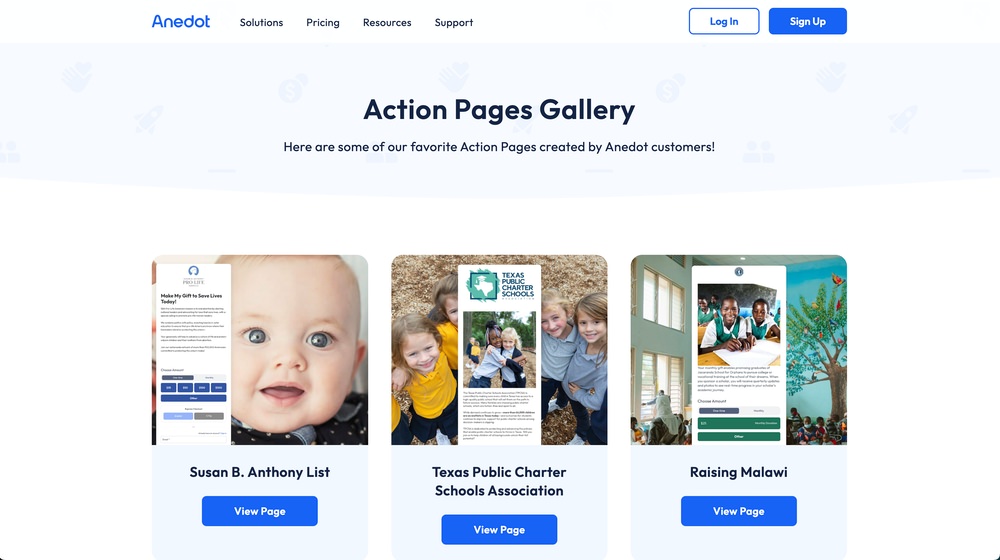
If you go to anedot.com and scroll all the way to the bottom here, you'll see that we have a “Getting Started” area and we also have an Action Pages Gallery link.
So this will link to a number of helpful example pages where some of these pages have background images, they have different layouts, some of them don't have background images.
So if you want to get a few design ideas, I suggest checking this out because these are just pages that our customers have designed very beautifully.
So we wanted to kind of put these out there for folks to get ideas from.
So that is a helpful resource that I always recommend.
→ View the Action Pages Gallery!
What's the difference between a donation page and lead page?
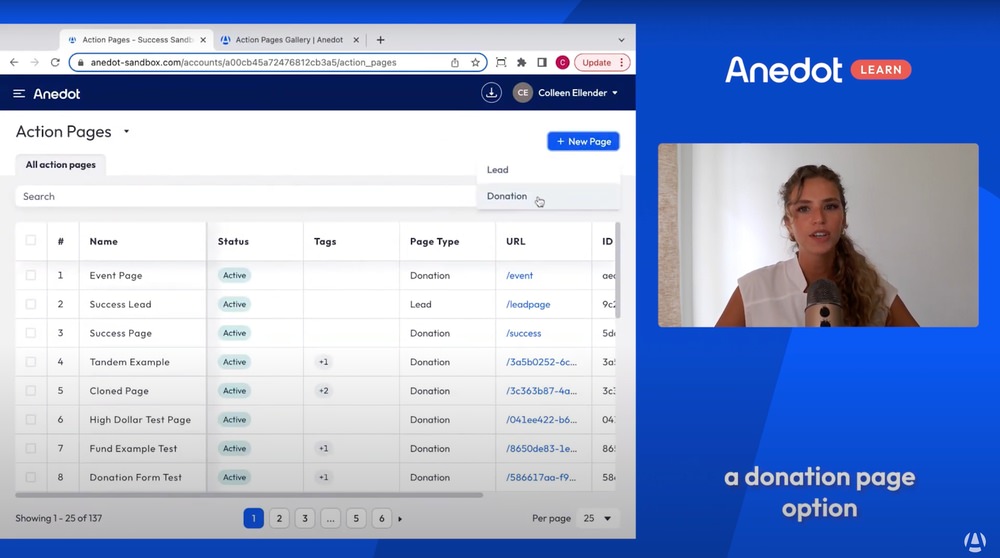
Okay. So if we are getting started and we log into your Anedot account and at the top you’ll click Action Pages, you'll see the option to click New Page here and you'll see there's a donation page option as well as a lead page option.
So this donation page option here allows you to accept contributions from your supporters and collect any information about them as well.
Whereas a lead page will allow you to collect non-donation information. So most of the time we see this used for petitions, emails, sign ups, things like that.
So really the main difference here is a donation page will accept a contribution, a lead page will not.
But both of these and I'll show you guys this, but both of these will collect information by adding different form fields.
Design tab
So if we select Donation here and I'll just show here, if I click Actions and Edit, I'll pull up this donation page that we have built.
On the right hand side, you'll see that there's a preview and this is where if you need to edit anything, you can just click directly there and a pop up will pop up for you to be able to edit directly.
There are five sections for customization and each of these sections has an independent preset option which you can set to save time when creating pages.
Or, if you have a high number of pages in your account and maybe you need to update the logo or update one thing, you can do it that way.
Brand
So what that looks like on the Design tab here is if we click Design and we click Brand and then we click Edit Brand, this tells me it's editing the two pages attached to this general preset, on the Design tab specifically.
If I wanted to create a new brand, I'd create it there or if I wanted to do the mass update, like I mentioned, you can click these little bar icons.
And we'll see, okay, this is attached to the success page, the clone page, and if I wanted to add it to additional pages, I could.
So this Brand Preset option is a very helpful resource when updating maybe one minor thing or even one major thing on a high number of pages.
So wanted to mention that. And again, this is found on each of these tabs here and you'll see that there's always the option to create a new preset or edit the preset that already exists.
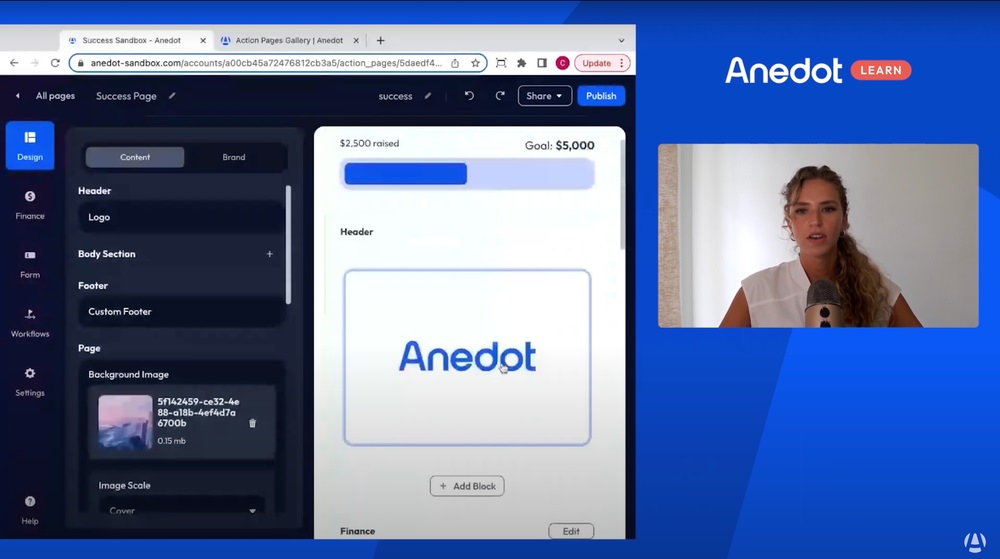
So on the Design tab, we can see here you can customize your colors, your logo, your font, and that's under this brand area here.
So this is where we added our logo.
You can change the positioning or the sizing and you can also customize your action buttons or different areas of the page by dragging and dropping the little color dropper, or adding your hex code.
So that's something that's nice, if you want to go in, add your logo, and match it directly to your preset buttons, you can do that.
So we recommend doing that.
Content
And if we go over to the Content area, this is where you can add your background image.
You can select what you want that background image to look like, as well as play with different layouts.
So this is a one column center and stacked form and I'll show what this looks like in a minute.
But you can play with the different designs there as well as add an exit intent if you'd like.
So that will basically pop up when someone goes to exit the page, if they didn't process the donation or submit the lead form.
Finance tab
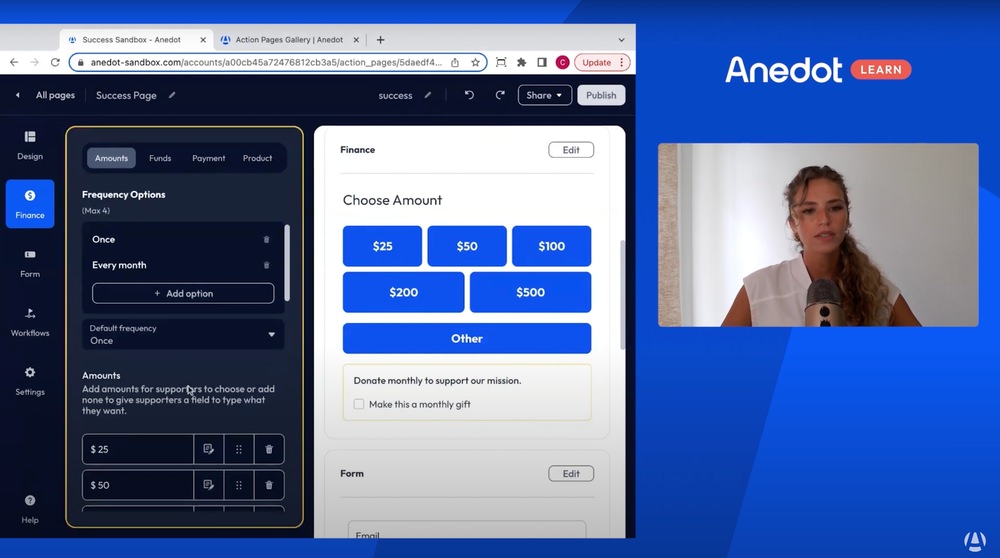
Amounts
Moving along to the Finance tab here, this is where you can edit your Payment Preset amounts or enable your preset amount.
So if you don't want to have so many, you can delete them.
If you'd like to add maybe a description next to the number, or next to the amount, you can do that here and that will show directly next to the button.
If you'd like to add different frequency options, this is where you'll see there's the once or the every month, which is what we see often.
Or if you wanted to add every quarter or every year, you can add those different frequencies, the max amount is four.
And when we're done editing this Amounts area, this is where we hit save to this preset and it would save it to our page.
Funds
On the Funds section here, and this is where you can set up multiple visible funds and have funds maybe split out differently when an individual donates $100, you could have $50 go to the general fund and $50 go to the missions fund.
Or if you want to set up additional funds to show in a dropdown, you can do that as well.
To set up a new fund, you do that in the Settings area, under Finance and we have a whole help guide on Managing Funds at help.anedot.com.
So this is a helpful resource that we see a lot of folks take advantage of as well.
Again, you can just leave it under your general fund if you just have one fund and are tracking it that way. So again, we’d hit save here.
Payment
Moving along to the payment option.
So this is where if you want to disable any payment options, you can do so as well as allow the donor to cover the fee.
So you can allow the donor to opt in or opt out or disable the organization or disable the donor from paying the fees as well.
So this would be where the organization pays the fees. So that option is available to you as well to update there.
Form tab
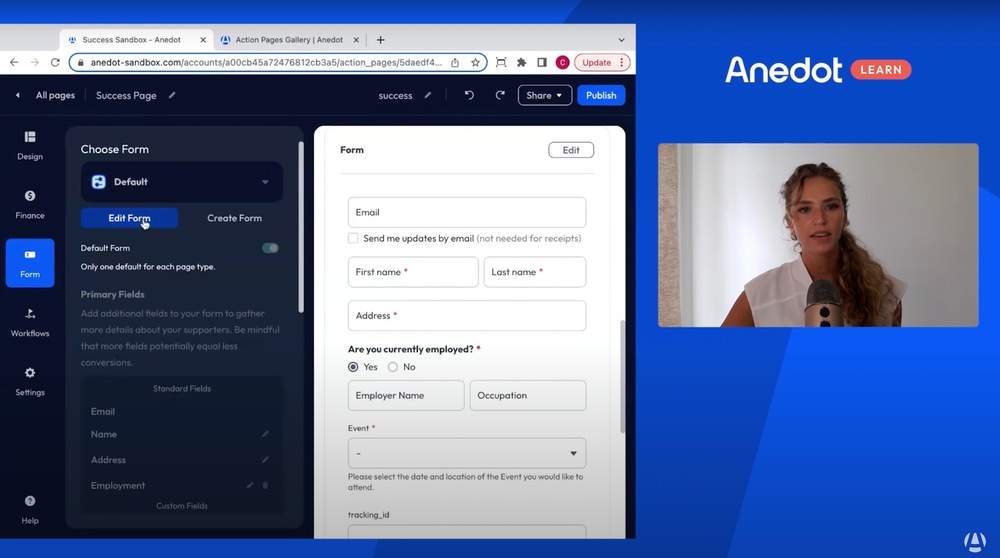
On the Form tab here, you can edit what information you'd like to collect from the donor as well as add any hidden fields that you like.
So if we hit Edit Form here, this is where we'll have email, name, address, employment.
We can delete that if we want to. If we want to allow maybe an organization to be able to donate, you can allow that as well by just clicking the little edit icon next to name.
In regard to custom fields, you have an array of different custom fields that you can add if you want to maybe add a requirement, ask a question, you can absolutely do that.
And then once you actually save that custom field, it will show as an account field.
So maybe later on, if you build an additional page with kind of a different design or different Field Preset, those custom fields will also be saved.
So you don't have to retype those out if it's something long. It’s already saved for you there. So there's a lot of flexibility there.
And I mentioned too I wanted to highlight here, we do have the ability to add a hidden field, as you can see here.
So this would be if you're passing any information that you don't want to be forward facing, such as for tracking, you can add that there as well.
And we'll have the communication consent toggle. If you'd like to toggle that on.
You can do that. So there's a lot of flexibility within the Form field area.
If you want to leave, just name, email, address, employment. You can do that or you can add additional fields as you need.
Workflows tab
Upgrade
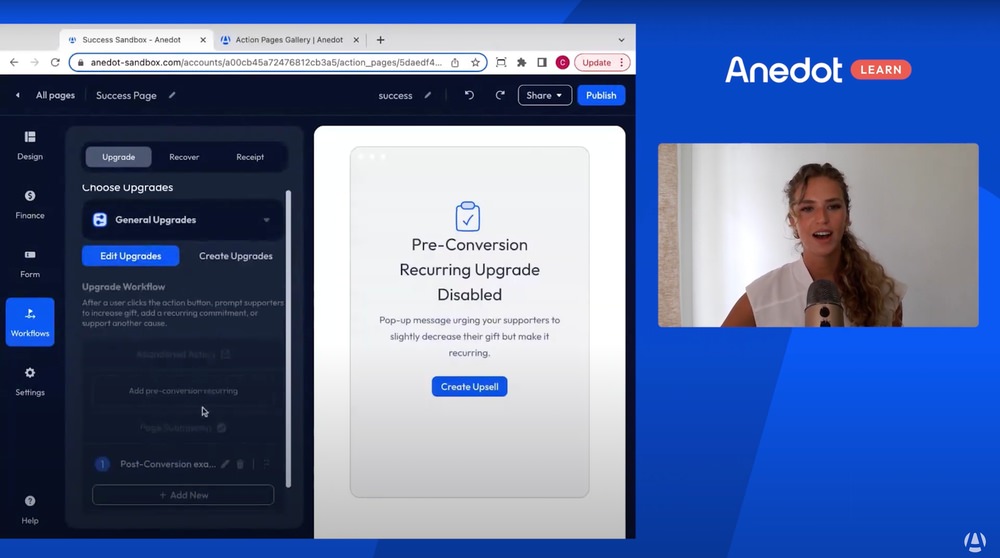
Under the Workflows tab, you can enable Abandoned Actions, you can set different upgrades and you can customize your receipts.
So this upgrade option here, we’ll actually have a whole video on because there's a lot that you can do here, but you can add a pre-conversion recurring upgrade or a post-conversion upgrade.
And these are fully customizable.
Again, there's a lot that you can do. We have a help article on Upgrade Presets as well, but we'll shortly have a video explaining these kind of best practices.
But in short, to kind of briefly mention it is if we add a pre-conversion, for example here, it will prompt me to either edit one that I already have or create a new one.
You can customize what that looks like for both pre and post conversion.
So this is a helpful resource that a lot of people find useful.
Recover
Under the Abandoned Actions, this is a reminder to the donor to donate if they visited the page and maybe got distracted before they completed their donation.
So we can edit that, edit that message, that sends to the donor as well as the timing of the email.
So this is a helpful resource as well.
Receipt
Moving along to the Receipt tab here, this is where if you want to edit your receipt, you can edit the message of the receipt.
It will have your logo as well. And if we want to, if we want to, we could add a Callback URL to where if a donor donates or maybe submits a lead form or a survey that we mentioned earlier, you could add a donation page as the Callback URL.
So, once they submit that survey or that signup, they could be led to a donation page.
So there's a lot that you can do there as well under the Callback URL sections.
So automatically every email that sent out will include the donation information, the donor name, the donor information, the donation amount, the time of the donation, as well as your organization's information.
So this is something to note as well. When you're editing this receipt area, you can see we have the submission details included in that receipt.
If your donor would like to access all of their past donation history, each receipt will include a link to create a DonorID within Anedot.
They can edit their payment information as well as update a recurring commitment if needed.
Settings tab
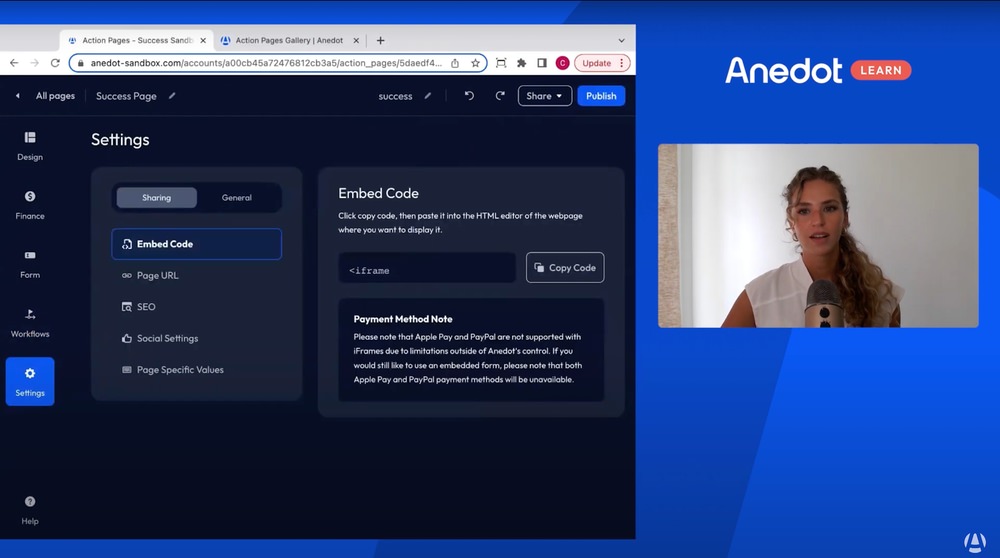
Sharing
Last, under Settings you can set, you can grab your embed code, you can update your page URL so your page slug can be edited here or for easy access at the top here.
You can set your SEO settings, your social settings, as well as your page specific values.
So this is where previously when I mentioned if you add a hidden field for maybe tracking, so if there's a tracking ID, you can add that here to this page, as well as if you want to have a goal at the top of your page, you can set that goal amount as well.
General
Under the General button here we see that this is where if you're using tracking codes for maybe GTM or Meta Pixels you can add those here as well as custom CSS.
So these are the two areas under General where you can add those tracking codes and enable or edit custom CSS.
So once you are ready to share your page, we'll make sure we hit publish so it saves the changes and we'll hit Share here.
So this will give me the option to copy my link to my clipboard, or copy my embed code, or download the QR code.
So every Action Page, lead page, or donation page will have a automatically generated QR code, which is super helpful. So that is all found under your Share button.
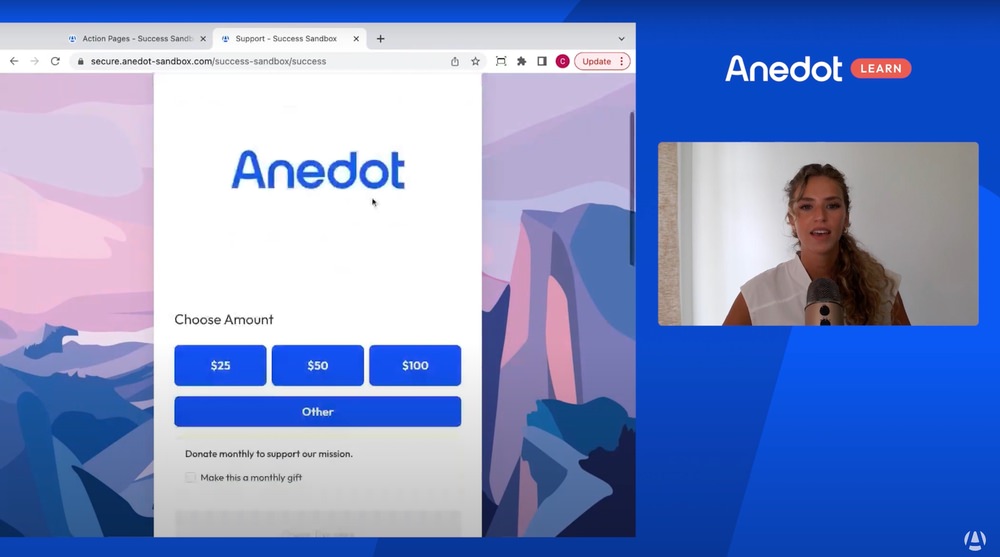
So if I go in and I copy my link and I'll paste it here, this will show me what my page looks like.
So you can see $800 has been raised on this test donation page.
This is my exit intent because I moved my mouse like I was going to exit the page. That will pop up because I have that set and then I have my settings preset amounts, my option to make it a monthly donation, as well as any custom fields that I added here.
Other important Action Page organizational tips
So from the donor facing side, that's what the donation page will look like.
Whereas if we go back to all of our Action Pages that we've created, so donation pages and lead pages I mentioned, it's really helpful to be able to clone a page.
So if you create maybe the basic donation page that you'd like to be the base of all of the donation pages you create going forward, you can always hit Clone.
And what that will do is it will carry over all of the details of the page that you previously created.
And it will just have this dash clone in the name. So you can always hit that and you can rename it to whatever you would like there and then hit that check mark and it will save that name.
So from there you can go in and just edit the details that you'd like to be edited and use that as a new donation page.
And in regard to actually organizing our donation pages, I always suggest using Tags and Teams.
This is a really helpful tool when you just want to visually be able to grab different pages or see what teams are using what pages.
You can see we have a test team and we have a digital team. So what that's used for, I'll show you here, if you click Tags, you can create a new Tag.
So for example, this digital team one here, say you have a digital team on your account and you’d only like them to have access to the pages that they're working on.
You can create a digital team Tag and a digital team within your settings, and if you add those individuals to that team, they will only have access to those pages in the data that pertains to those pages.
So that's a super helpful kind of organizational tip as well that we always recommend.
So there's a lot you can do with Action Pages in designing Action Pages.
If you ever have questions, we have help articles that provide really how to customize each area of the account at help.anedot.com, and you can always email us at help@anedot.com.
Thank you for watching!
80 Community Service Ideas for Nonprofits